
Tasmota is an open-source firmware for smart home devices that provides a powerful and flexible platform for controlling and automating your home. By flashing your TeHyRelay/GumRelay device with Tasmota firmware, you can take advantage of a wide range of features and integrations that are not available with the default firmware.
To get started with Tasmota, you’ll need to follow a few simple steps. First, you’ll need to download the latest Tasmota firmware from the official website. Once you have the firmware downloaded, you can use a tool like Tasmotizer to flash your device. Tasmotizer is a simple and user-friendly tool that makes it easy to flash your device with Tasmota firmware.
Once your device is flashed with Tasmota firmware, you can use the Tasmota web interface to configure it to your liking. This interface provides a wide range of configuration options, including support for MQTT, HTTP, and more. You can also use the web interface to set up rules, timers, and other automation features.
First start configuration
Connect GumRelay to a power source, (Recommended 4,5 to 6Volt).
Please keep the correct polarity.
After that, a WIFI network will be created by the ESP01 Module. Please connect to the tasmota-XXXX Network.
Open in your web browser http://192.168.4.1/
A configuration page will appear.
At AP1 SSID provide your WIFI network name.
At AP1 Password provide the password of your WIFI network.
To find out which IP the GumRelay has received, you’ll have to connect to your router and look at DHCP Leases. Or you can use apps like Wireshark to scan your local network for connected devices.
Then connect to the like: http://192.169.xx.xx/ with your browser and a GumRelay Control page will appear.
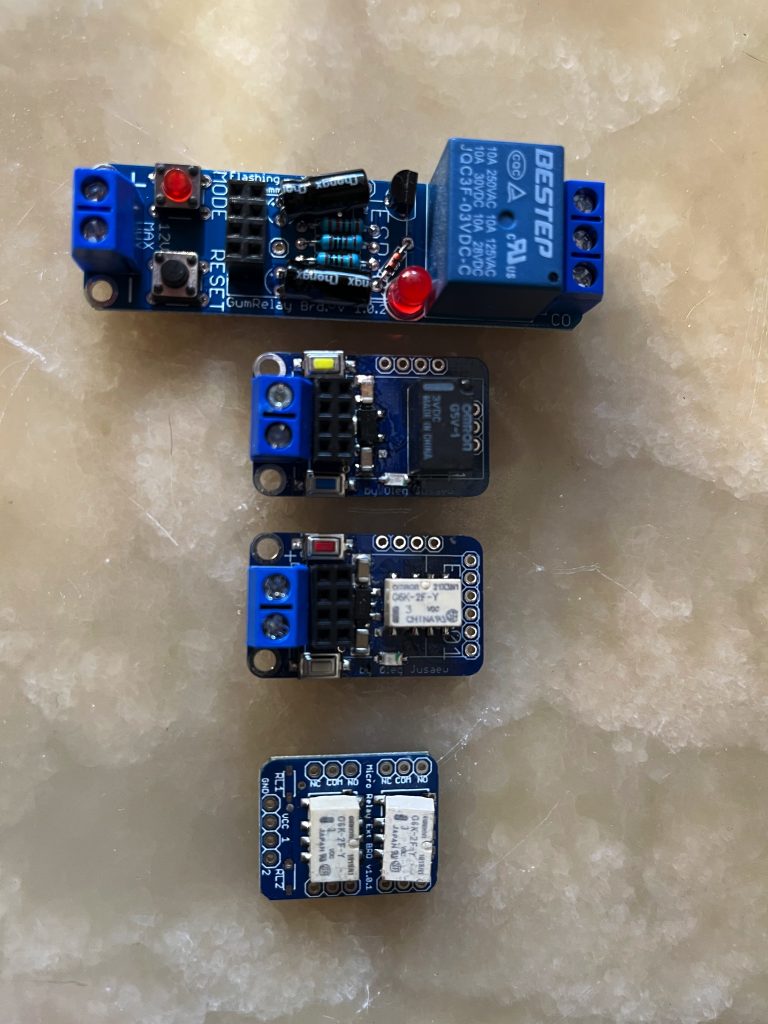
There are 3 different relay sizes available at the TeHyBug store which come with pre-flashed tasmota firmware. Actually, there is also a PSU breakout board, which uses the micro relay and uses tasmota firmware too.
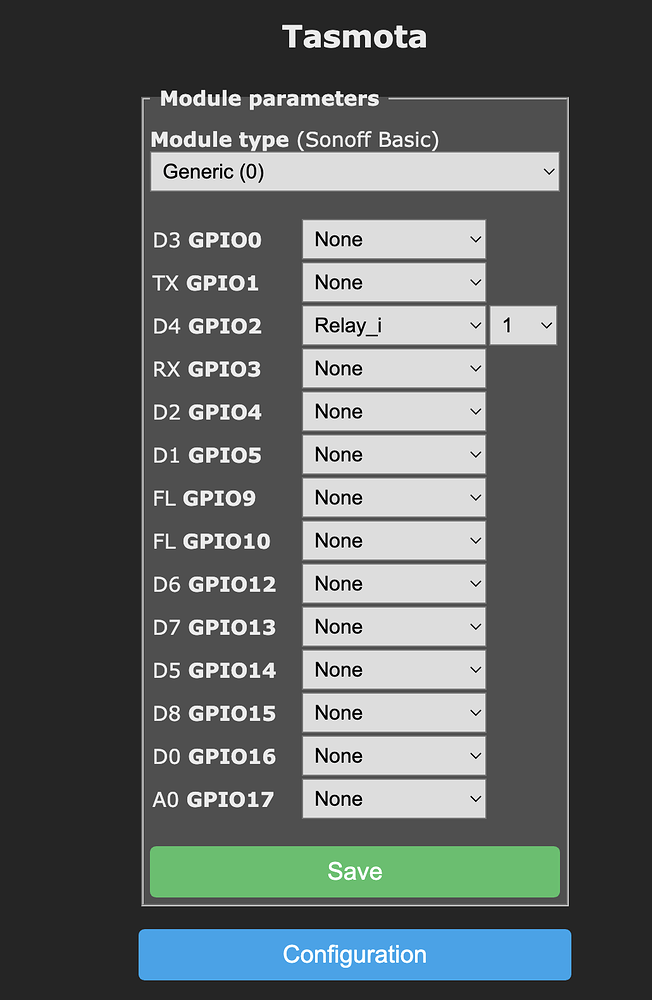
Previously I flashed a custom tasmota firmware that was already pre-configured with the proper settings, but since tasmota releases updates more frequently, I decided to flash the standard tasmota firmware to the esp-01 modules. The standard firmware requires additional configuration on the module configuration page. To set up your board please use the setting as displayed on the screenshot below.
Leave a Reply