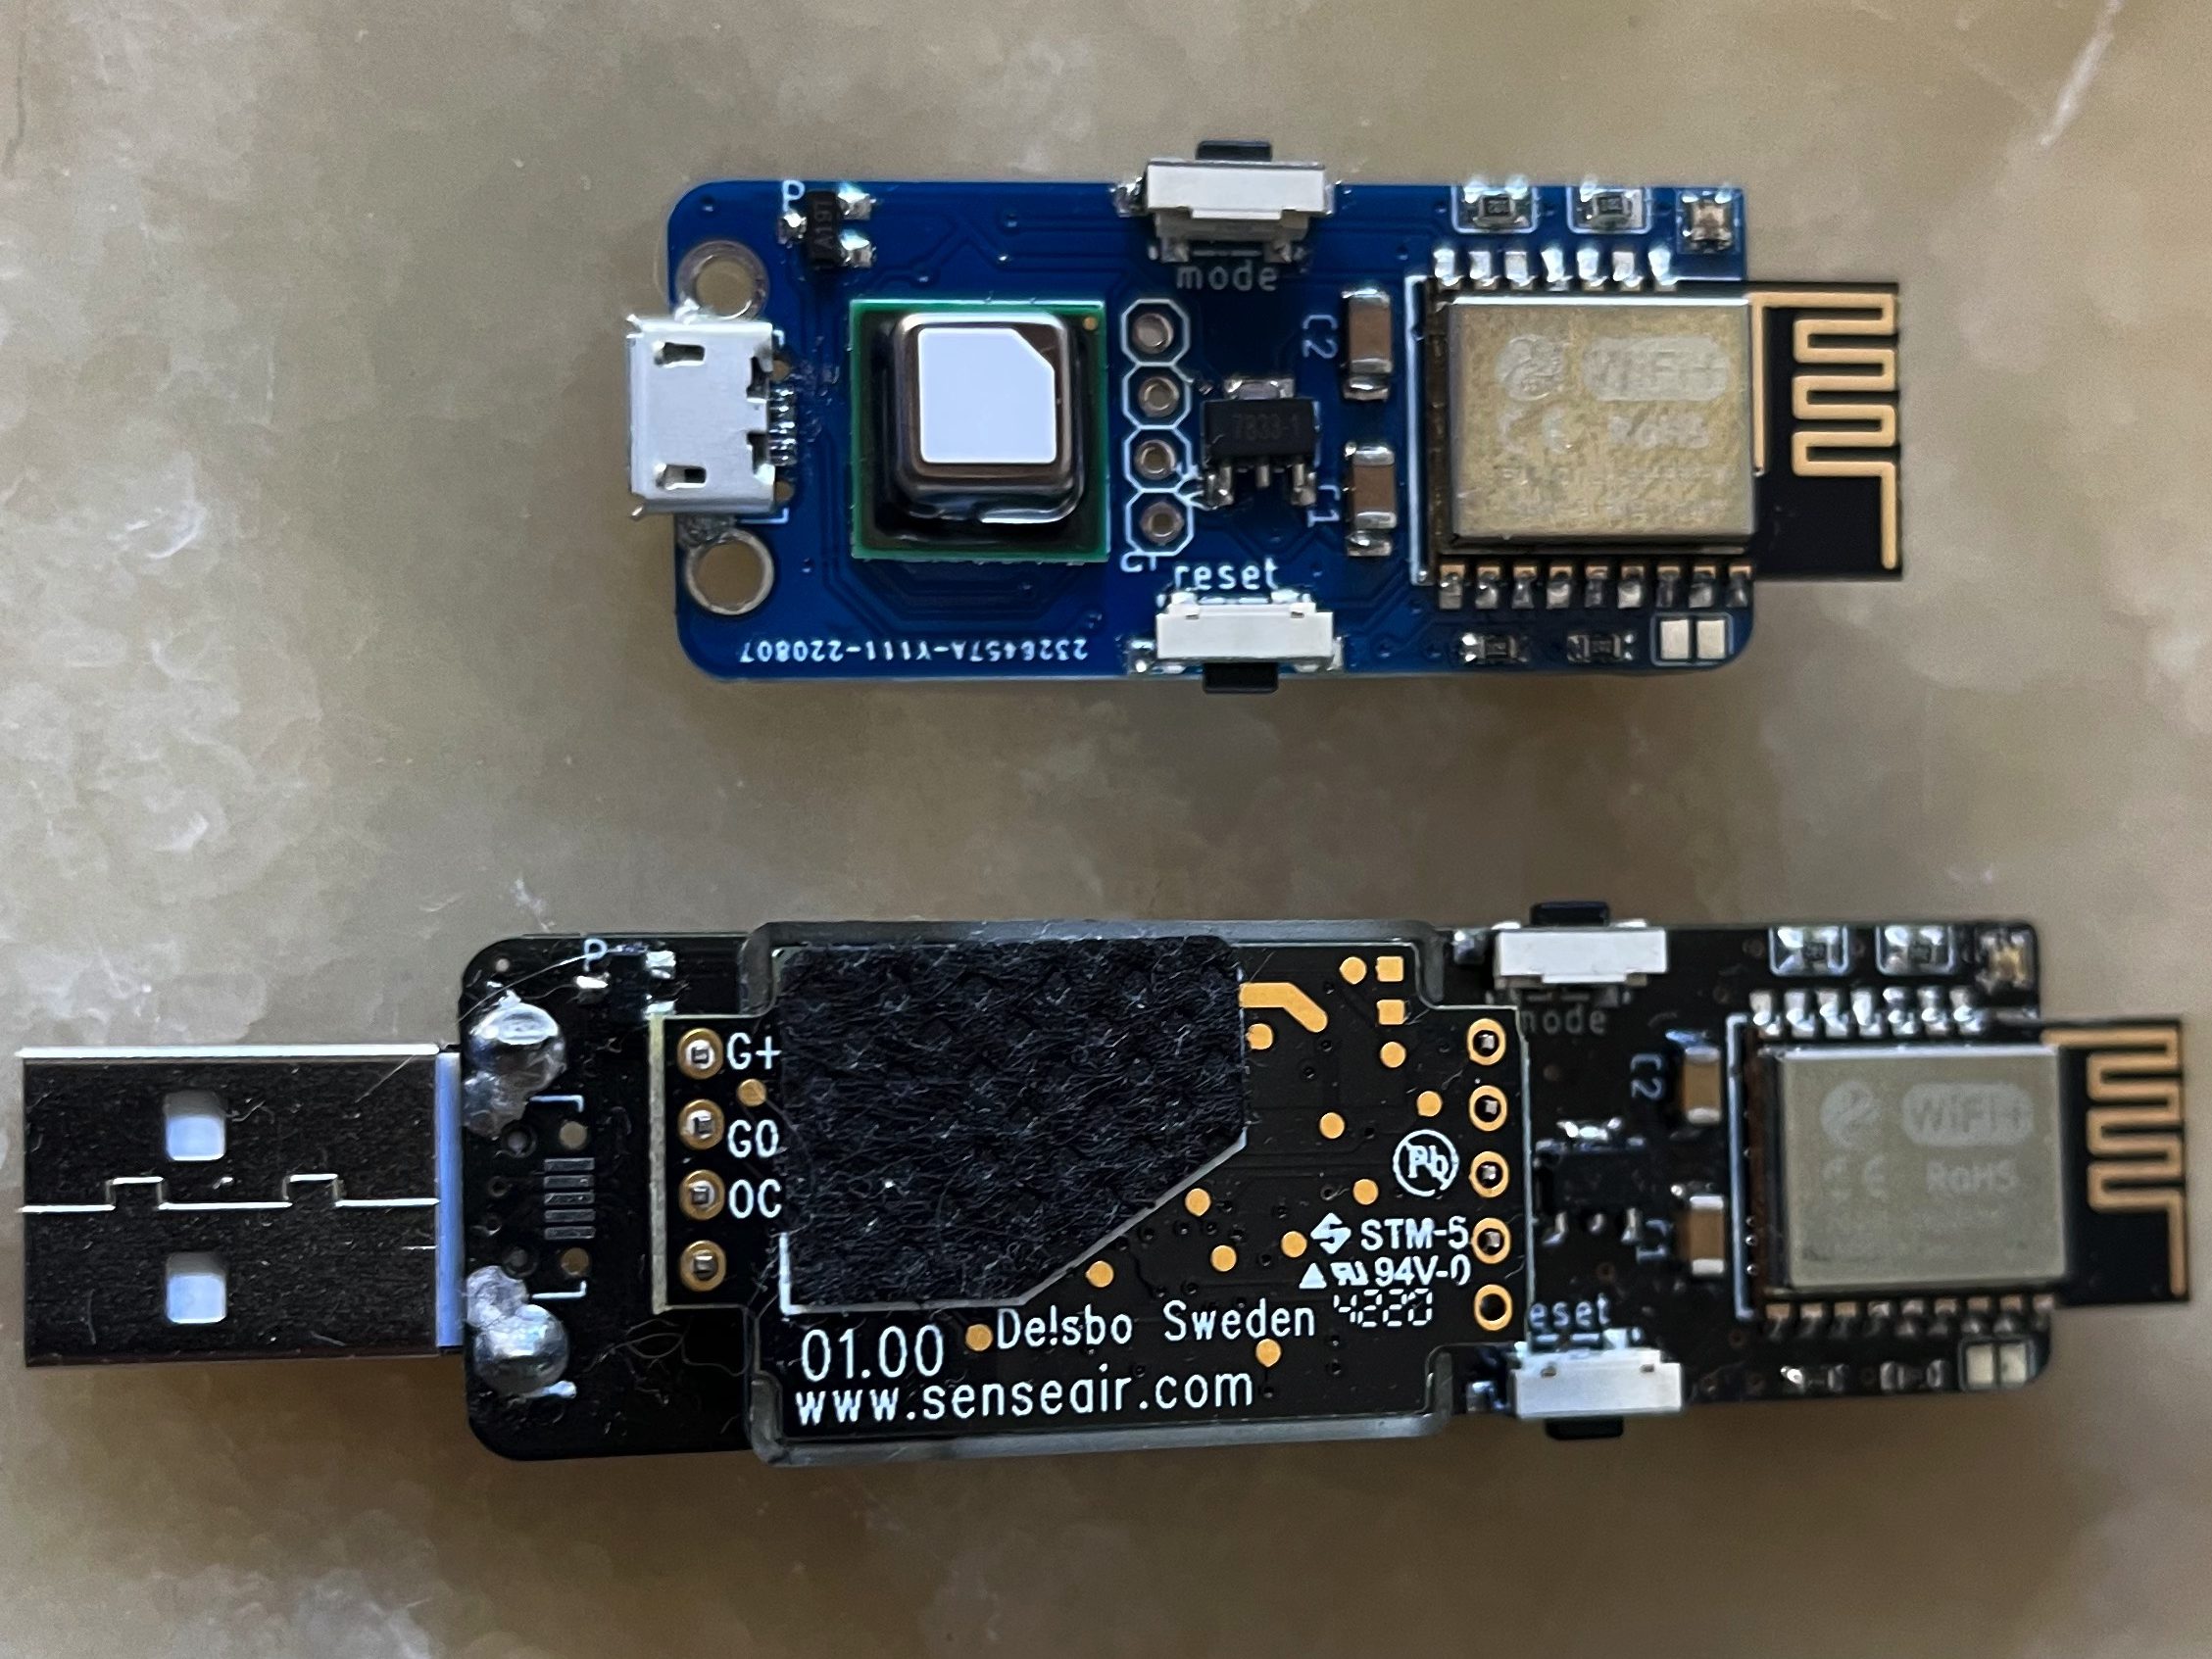
At TeHyBug, we’re always looking for ways to improve and expand our product offerings. That’s why we’re thrilled to introduce our latest innovation – a new, smaller version of our CO2 sensor board.
The new board features the SCD4x sensor, which is smaller than the previous sensor but still maintains the same high level of accuracy and reliability. https://blog.tehybug.com/index.php/2022/02/20/tehybug-senseair-co2-sensor/
This means that the new board is even more compact and can fit into tight spaces, making it ideal for a wide range of applications.
To showcase the new board in action, we’ve created a 3D printed enclosure and put together a demonstration video, which you can watch here: https://youtu.be/aRd_TyuY4yc. The video demonstrates the board’s features and capabilities, including the OLED display connector.
To make the most of the new board’s features, we’ve also released firmware that includes support for OLED displays and HomeAssistant autodiscovery. This firmware is available on our GitHub repository at: https://github.com/gumslone/tehybug/tree/master/tehybug_co2_firmware. This allows users to easily integrate the new board into their existing smart home setups and access sensor data in real-time.
But that’s not all – we’ve also upgraded our Senseair S8 board to support a display connection, making it even more versatile and useful for a range of applications. This upgrade provides even more options for displaying sensor data and makes the board even more accessible for DIYers and smart home enthusiasts.
At TeHyBug, we’re committed to providing high-quality products that are both reliable and easy to use. With our new mini CO2 sensor board and upgraded Senseair S8 board, we’re excited to offer even more options for monitoring air quality and integrating sensors into smart home setups. For more information about our products and to stay up-to-date on our latest developments, be sure to visit our website and blog.
An enclosure for 3D Printing is available on Thingiverse for download: https://www.thingiverse.com/thing:5494215
I have just received my CO2 sensor thanks. I want to use it standalone for CO2/ temp display as in your photos. Not with a network. I cant find any doco on how to get into this mode. From the firmware I can see the mode button is configured for click, long click & double click handlers – is there are doco other than reading the code? Are the left & right buttons in the code just for debugging? Thanks!
Hi,
most handlers are not used, the documentation is available in the readme.
https://github.com/gumslone/tehybug/tree/master/tehybug_co2_firmware
i.e. to turn off the Network mode and use the offline mode, hold the IO_5 (it’s located on the device’s back) Button and hit reset, then when you see a purple light release the IO_5 Button.
The latest firmware release remembers the state online/online, so after the device restart, it boots to the previously set state. Older firmware versions always boot in network mode.
The left side button is mode and the right side button is reset.
If you hold the mode button for 15 Seconds it will do a factory reset and reboot the device.
I will also extend the documentation at GitHub and add a photo with a button description.