Category: Uncategorized

Best Neopixel WLED/Fastled Ambient Light Controller? WS2812B/SK6812

GumPixel Board aka Neopixel Controller with ESP8266 ESP-12F which has 4MB memory and supports OTA updates

I have created a compact and versatile neopixel driver board that has multiple uses, including functioning as a ser2net programmer, data logging environment, and reading UART sensor data. However, its primary purpose is to drive WS2812B/SK6812 led strips or matrixes and create captivating light effects. It can be programmed with WLED to drive Led Strips or with PixelIt to drive a Led matrix.

This board, also known as the GumPixel Board, is equipped with an ESP8266 ESP-12F with 4MB memory and supports OTA updates. It stands out because of its small size and user-friendly screw terminals and buttons. The board accepts a 5V power input and can output power to WS2812b LEDs. Additionally, it works with all 5V LED strips and can drive 8×32 led matrix displays like Pixel It with ease.

A compiled binary for the ESP-01 PixelIt led Matrix display is available under the documentation link below. You can also use it with the WLED library. The board includes a mode (GPIO_0) and RESET button, two soldering pads for connecting an additional button, and convenient screw terminals for wiring. A thick 5V power delivery trace is included to ensure sufficient current delivery to the LED strip, and a large low ESR capacitor improves system stability. Furthermore, a breakout for UART programming flashing and a hot-swap 2×4 Pin Female connector for the ESP-01 Module are provided.

The GumPixel board functions perfectly with WS2812/SK6812 LED strips and WLED software for Ambilight and Xmas tree decoration, as well as with WS2812/SK6812 LED Matrix displays. You can purchase it from Tindie by following the link below.

The GumPixel board is a powerful and flexible tool for anyone looking to create eye-catching lighting effects with LED strips or matrix displays. It is incredibly versatile and can be used in a wide variety of applications, from creating mood lighting in a bedroom or living room to adding visual flair to a DJ booth or stage show. The possibilities are truly endless.

One of the standout features of the GumPixel board is its small size and convenient screw terminals and buttons. These make it incredibly easy to install and use, even for those who may be new to working with LED strips or matrix displays. Additionally, the board is designed to be highly reliable, with features such as a thick 5V power delivery trace and a large low ESR capacitor that ensure stable operation even in challenging environments.

Another advantage of the GumPixel board is its compatibility with a wide range of software tools and programming languages. Whether you prefer to use WLED, PixelIt, or another software package, the board is designed to work seamlessly with these tools and provide you with maximum flexibility and control over your lighting effects.

Whether you are a seasoned DIYer or a novice looking to get started with LED lighting, this board is an excellent choice that will provide you with the performance, reliability, and ease of use you need to create stunning visual effects with ease.

https://www.tindie.com/products/21371/

What makes it special?

A small board with convenient screw terminals and buttons which takes a 5V power source on input and provides an output for WS2812b LEDs it also uses a simple ESP8266 ESP-01 Module. It works well with all 5V led strips and drives easily 8×32 led matrix displays like Pixel It.

A compiled binary for ESP-01 PixelIt led Matrix display is available under the documentation link below. You can use it also with a WLED library. https://github.com/gumslone/Pixel-It-ESP8266-ESP-01

Features:

  • Mode (GPIO_0) and RESET Button
  • Two soldering pads on the board back to connect additional button i.e. enclosure button which will replicate the mode button actions
  • convenient screw terminals for wiring
  • thick 5V power delivery trace for delivering enough current to the LED strip
  • large low ESR capacitor for a better system stability
  • breakout for UART Programming flashing
  • hot-swap 2×4 Pin Female connector for ESP-01 Module
  • works great with WS2812/SK6812 LED strips and WLED software for Ambilight and Xmas tree decoration
  • works great with WS2812/SK6812 LED Matrix displays

Where to get it? You can get one from Tindie: https://www.tindie.com/products/21371/

Smarthome sensors ZigBee or WIFI, which technology is best?

Both technologies have their advantages and disadvantages, here is a side-by-side comparison of ZigBee vs Wifi sensors for the smart home. For my comparison, I take the TeHyBug Wifi sensor and Aquara ZigBee Sensor which is connected through a HeilBee v4.5 ZigBee stick to my HomeAssistant.

ZigBeeWIFI
Requires a special ZigBee hub or coordinator stick. The Hub is usually connected through WIFI or LAN to the network.Doesn’t require any special hubs etc. Just a WIFI network. Is very versatile and can connect to a remote server.
Custom data serving modes require some custom software to be installed on the hub. i.e. zigbee2mqttAll the custom data serving modes already exist on the sensor, it supports HTTP POST/GET/etc. MQTT and other
Usually has a low signal rangeUsually has a long and widely spread signal range
Low power consumption, requires a small battery like CR2032 which lasts up to 1 yearWIFI is a power-hungry technology, so a 18650 Lithium Cell will last about a half year or more, depending on the sensor
Easy to add a device to your ZigBee netwoork, requires just a few button pressesHas a complex but more versatile installation and configuration. Requires WIFI network credentials and setting up MQTT broker details to be provided directly to the sensor through WEB UI.

Best and most powerful ZigBee stick?

The cc2652p based ZigBee sticks, also known as v4 ZigBee sticks, are currently one of the most popular options in the market. This is because these modules come with a strong signal amplifier and a PCB antenna that allows for transmission distances of up to 700m without the need for an external antenna. Compared to ZigBee sticks based on the cc2531 chip, these modules offer much better performance.

There are various ZigBee v4 sticks available from different manufacturers, which all use the common cc2652p chip and function in a similar way. However, most of these sticks lack wireless network communication capabilities, which can limit their use in certain scenarios. While there are some cc2652p modules with LAN capabilities, there were no ZigBee v4 sticks with ser2net over WIFI support that could be connected to a standard USB phone charger.

To address this limitation, I decided to design a ZigBee stick v4.5 that supports ser2net, which is wireless serial communication, and doesn’t need to be connected to a home automation hub via USB. The TeHyBug ZigBee Stick V4.5 was born from this idea, and it offers users the flexibility to connect the stick wirelessly to their home network without the need for additional hardware or cables.

The TeHyBug ZigBee Stick V4.5 features a built-in WIFI module that supports ser2net communication, allowing users to connect the stick to their home network wirelessly. This means that the stick can be placed anywhere within the range of the WIFI network, providing greater flexibility in terms of placement and usage. Additionally, the stick is compatible with a range of popular ZigBee devices and can be easily integrated into any existing home automation system.

In conclusion, the TeHyBug ZigBee Stick V4.5 is an innovative and flexible solution that offers users greater flexibility in terms of placement and usage. With its support for ser2net over WIFI and compatibility with a range of ZigBee devices, it’s an ideal choice for anyone looking to expand their home automation system.

Check out the full post >>

How to add a TeHyBug Smart Home Data Logger to your HomeAssistant?

There are several ways it add a TeHyBug to your HomeAssistant.
1. Embed a public graph to your dashboard.
2. Add it as an MQTT Sensor to your Homeassistant.

Usually, Home Assistant is installed on a Raspberry Pi or similar devices.
If you don’t have an MQTT Brocker, here is the instruction on how to install the MQTT Broker on your PI.

https://randomnerdtutorials.com/how-to-install-mosquitto-broker-on-raspberry-pi/

  1. Put your TeHyBug into a configuration mode.
  2. open HTTP://192.168.1.1 in your browser (Firefox works best)
  3. Configure WIFI Connection by providing your WIFI Credentials.
  4. Go to Custom MQTT Configuration and fill the required fields similar to the screenshot below, the MQTT Server should be the IP Address of your MQTT Broker
MQTT configuration example
  1. Save, activate the live mode and restart the TeHyBug.
  2. Make sure mqtt block in the configuration exists, if not please configure it a your home assistant integration. Open the configuration.yaml file of your home assistant and add a sensor block, if the sensor block exists, just extend it:

Example configuration.yaml entry:

sensor:
  - platform: mqtt
    name: "Temperature Test"
    state_topic: "/tehybug/sensor1"
    unit_of_measurement: "°C"
    value_template: "{{ value_json.t }}"
  - platform: mqtt
    name: "Pressure Test"
    state_topic: "/tehybug/sensor1"
    unit_of_measurement: "hPa"
    value_template: "{{ value_json.p }}"

After this, you will be able to add a new sensor entity to your dashboard.

TeHyBug – Configuration

Once you connect to the TeHyBug Wifi Network AP and open http://192.168.1.1/ in your browser, you will see the configuration index page.

TeHyBug 18650 Universal menu, other TeHyBugs have a similar menu

The first thing you should do is to provide your Wifi Credentials on the “Configure Wifi” page. Nothing special just fill the form with your network name and password.

The next step on TeHyBug 18650 Universal is to select the connected sensor on the “Sensor configuration” page. Here is also nothing special, just select the sensor that you have connected.

Then go to the “Current environment data” page and check if the sensor is delivering data properly.

As next select the desired data serving method, if you don’t know what an MQTT or HTTP POST/GET request is, then you should use the “Default configuration” page and leave other data serving methods untouched.

(For the “Default configuration” you’ll have to create an account at http://tehybug.com )

(If you chose the default configuration please write down the TeHybug key. You will need to provide it at your TeHyBug account.)

On the default configuration page, you’ll have to define the data frequency in minutes. Data frequency is a time interval that defines how often should the TeHyBug measure the sensor data and send it to a remote data server. Lower data frequency means higher power consumption and causes the battery to discharge faster.

Success message after saving the configuration

Once you click save, the success message will ask you to activate the live mode and start serving data. If you are ready with your configuration, you can click the “activate live mode” link. Optionally you can also activate the live mode from the index page, so you don’t need to do it on the configuration page.

Success message after the live mode activation

Then you will see the next message to restart your TeHyBug, when you click the restart link, your TeHyBug will close the WIFI Network AP reboot and start serving data.

Done!

Login to your data server and check the TeHyBug Sensor data.

TeHyBug – first start instructions

First start guide

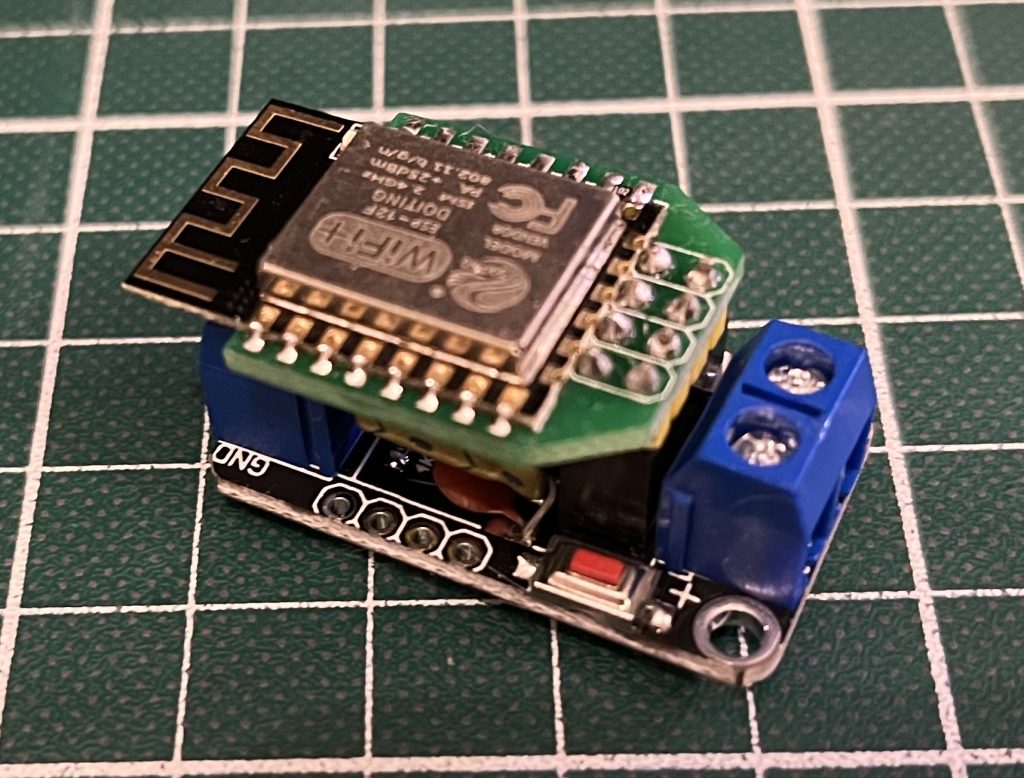
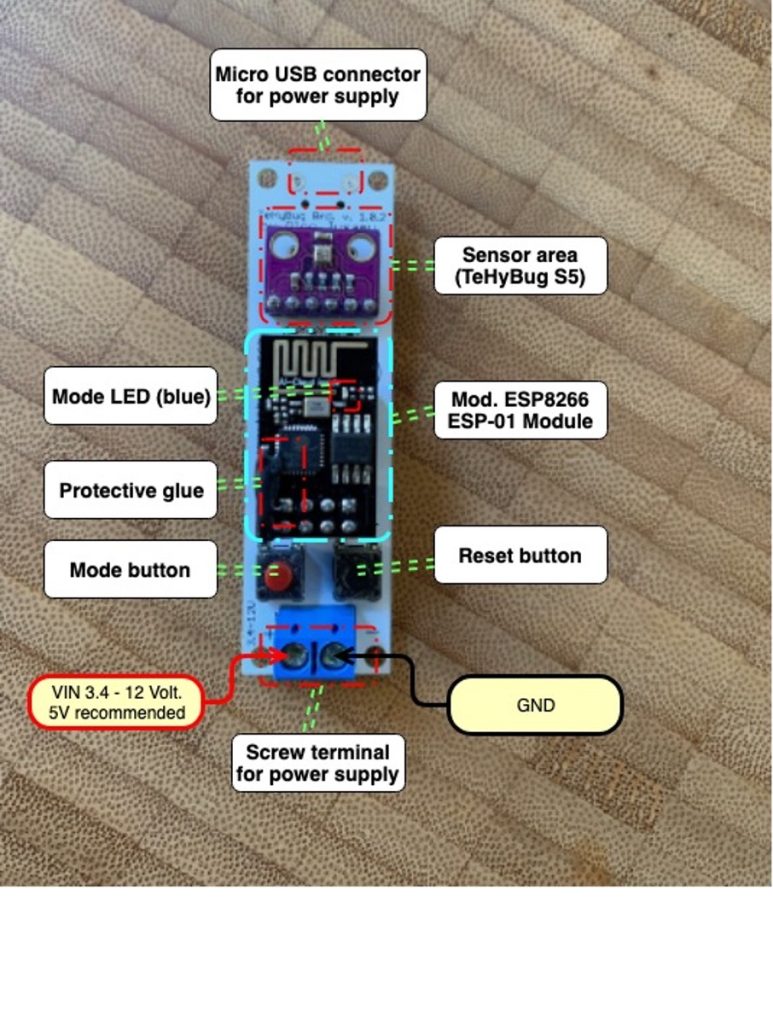
Important: You will notice black glue on the front of the ESP8266 ESP-01 module, don’t try to remove it! It protects a thin tiny wire, which enables the power-saving deep sleep mode of the chip.

Warning: TeHyBug is not protected against reverse polarity. Reverse polarity of power source will damage/burn your device. Make sure you connect the power to the screw terminal correctly.

When you connect a power supply (min 3.4V, max 12V, 5V recommended) to your TeHyBug, the blue LED on the ESP-01 module will light up solid, which means that your TeHyBug is in a configuration mode.

If you plan to use a 9V Battery make sure that the real battery voltage is below 10 Volts otherwise it will damage/burn your device.

TeHyBugs with an OLED display are already preconfigured in a „display only mode“ and are ready for use, just connect it to a power supply. If you would like to change the configuration or use some different data serving modes: you can put your TeHyBug into a configuration mode by pressing the RESET „BLACK“ button and shortly after that the MODE „RED“ button, the blue led will blink shortly and light up after 3 seconds solid.

Configuration

  1. Open with your computer or mobile phone a list with available Wi-Fi networks, there will be a new Wi-Fi network called TeHyBug_XXXXXX
  2. Connect your device to a TeHyBug Wi-Fi network.   
  3. After your device is connected to TeHyBug Wi-Fi network, start your web browser and open this address: http://192.168.1.1/

The TeHyBug configuration webpage will open and you will have multiple multiple configuration choices.

You should start first with the Wifi configuration and provide there the Wifi Credentials of your home network.

Once the wifi configuration is saved, continue with the data serving configuration, there are several data serving choices:

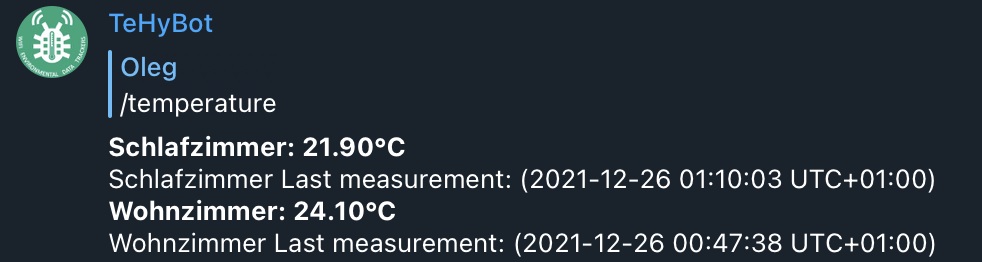
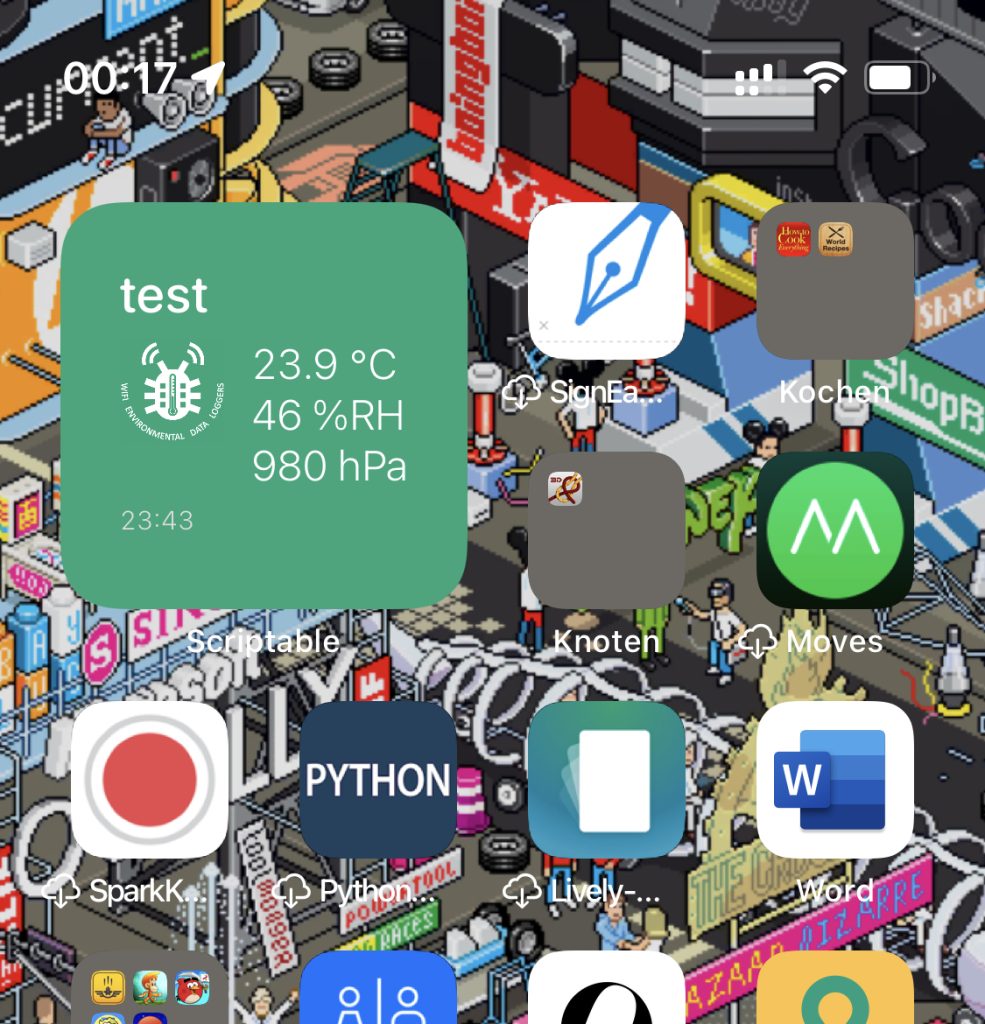
Default settings if you are going to use the tehybug.com data server (signup at tehybug.com website and add your TeHyBug into your account) or custom settings where you can define the URL of any other data server.

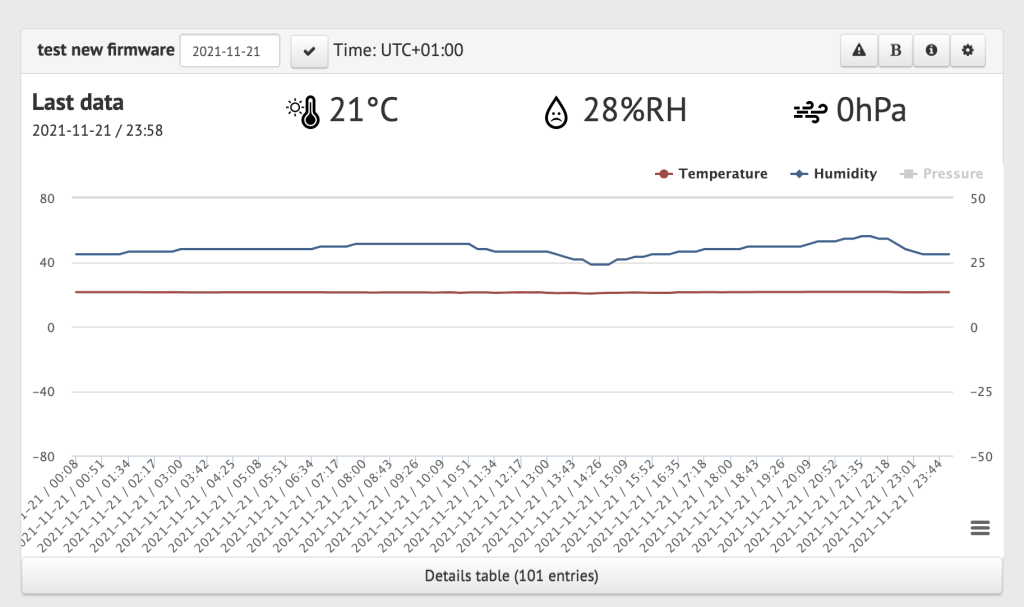
After everything is set, you can activate the live mode and restart your TeHyBug, it should start serving the environmental data.

How to activate configuration mode manually with buttons on the board?

If you have provided incorrect Wi-Fi credentials in the configuration mode or you would like to change the settings:

Press the RESET „BLACK“ button and shortly after that press the MODE „RED“ button, the blue led will blink shortly and light up (after 3 seconds) solid, after that, you will be able to connect to a TeHyBug Wi-Fi network and change your configuration.

How to activate the live mode manually with buttons?

In case you have put your TeHyBug into a configuration mode by mistake (the blue led lights up solid) and you don’t want to change your previous settings, you can activate the live mode by pressing the RESET „BLACK“ button, and shortly after that press the MODE „RED“ button (the same way you put your TeHyBug from a live mode to a configuration mode), the blue LED will blink short (it means that you TeHyBug is in live mode, connecting to the configured Wi-Fi network and is serving the data).

Your TeHyBug has an additional Micro USB connector, so you can power it directly from a USB power supply. DO NOT use a battery and a USB power supply at the same time, it will damage your devices.

For more info’s please visit http://tehybug.com/